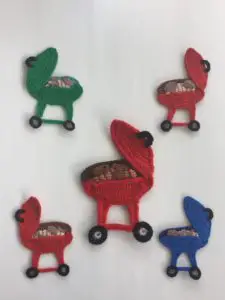
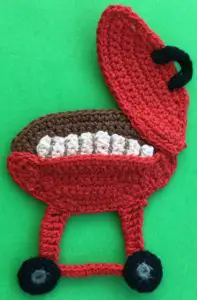
Welcome to my crochet barbecue pattern. The finished crochet barbecue applique will look like this.
There’s also a video tutorial for the pattern available on my YouTube channel at Crochet Barbecue Applique Tutorial.
Other patterns that are in the teddy bears picnic blanket series include the blanket, the plaid picnic blanket, picnic basket, the kite, picnic table, food for the picnic table, food for the picnic blanket, pram, airplane, barbecue apron and utensils, tree, blossoms and a swing, teddy bear applique, child teddy bear and baby teddy bear, teddy bear with accessories, teddy bear and combining the teddy bears picnic baby blanket.
The pattern is available to view for free on this website by scrolling down, or if you would like to download the ad-free version, it’s available on my Ravelry store for $1 at Crochet Barbecue Pattern.
This pattern will be using UK terminology. If you would like to view the US version go to Crochet Barbecue Pattern (US Version).
Crochet Barbecue Pattern UK
Abbreviations
- st – stitch
- sts – stitches
- ch – chain
- sl st – slip stitch
- dc – double crochet
- htr – half treble crochet
- tr – treble crochet
- dtr – double treble crochet
Materials Used
- 6 colours of cotton or wool, I used 4 ply crochet cotton.
- A crochet hook, I used a 1.25mm hook.
- Scissors.
- Darning needle to weave in ends.
- Sewing thread and a sewing needle to stitch the barbecue together.
Size
Large (Using 8 ply wool)
17.5cm x 11cm or 7” x 4.5”
Medium (Using 4 ply crochet cotton)
12cm x 8cm or 4.75” x 3”
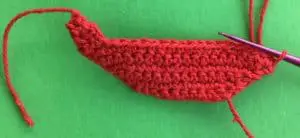
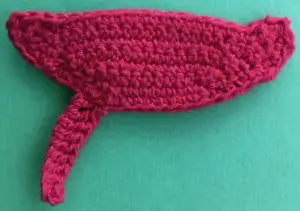
Bottom Barbecue Section
10 ch.
Row 1: Work 2 dc in 2nd ch from hook, 1 dc in each st to last st, 2 dc in last st. Turn. (11 sts)
Row 2: 1 ch, 2 dc in 1st st, 1 dc in each st to last st, 2 dc in last st. Turn. (13 sts)
Row 3: 1 ch, 2 dc in 1st st, 1 dc in each st to last st, 2 dc in last st. Turn. (15 sts)
Row 4: 1 ch, 2 dc in 1st st, 1 dc in each st to last st, 2 dc in last st. Turn. (17 sts)
Row 5: 1 ch, 2 dc in 1st st, 1 dc in each st to last st, 2 dc in last st. Turn. (19 sts)
Row 6: 1 ch, 2 dc in 1st st, 1 dc in each st to last st, 2 dc in last st. Turn. (21 sts)
Row 7: 1 ch, 1 dc in each of 1st 3 sts. Turn. (3 sts)
Row 8: 1 ch, 1 joined dc over 1st 2 sts, 1 joined dc over same st as last part of joined dc and next st. Turn.
Row 9: 1 ch, a joined dc over both sts. Fasten off.
Join cotton to other side as shown.
Row 1: 1 ch, work 1 dc in each of 1st 3 sts. Turn.
Row 2: 1 ch, 1 joined dc over 1st 2 sts, 1 joined dc over same st as last part of joined dc and next st. Turn.
Row 3: 1 ch, a joined dc over both sts. Don’t fasten off.

Neatening Row
1 ch, work 1 dc in each st around. Join with a sl st in top of 1st st. Fasten off.

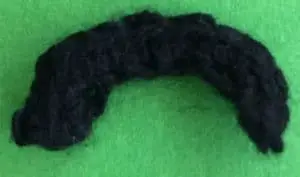
Lid
10 ch.
Row 1: Work 2 dc in 2nd ch from hook, 1 dc in each st to last st, 2 dc in last st. Turn. (11 sts)
Row 2: 1 ch, 2 dc in 1st st, 1 dc in each st to last st, 2 dc in last st. Turn. (13 sts)
Row 3: 1 ch, 2 dc in 1st st, 1 dc in each st to last st, 2 dc in last st. Turn. (15 sts)
Row 4: 1 ch, 2 dc in 1st st, 1 dc in each st to last st, 2 dc in last st. Turn. (17 sts)
Row 5: 1 ch, 2 dc in 1st st, 1 dc in each st to last st, 2 dc in last st. Turn. (19 sts)
Row 6: 1 ch, 2 dc in 1st st, 1 dc in each st to last st, 2 dc in last st. Turn. (21 sts)
Row 7: 1 ch, 1 dc in each st to end. Don’t fasten off.

Neatening Row
1 ch, work 1 dc in each st around. Join with a sl st in top of 1st st. Fasten off.

Handle
8 ch.
1 dc in 2nd ch from hook, 3 dc in next st, 1 dc in each of following 3 sts, 3 dc in next st, 1 dc in last st. Fasten off.
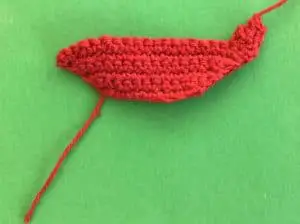
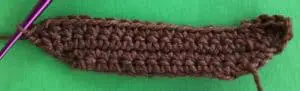
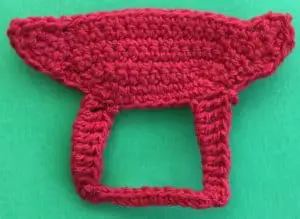
Top Part of Barbecue Section
14 ch.
Row 1: Work 2 dc in 2nd ch from hook, 1 dc in each st to last st, 2 dc in last st. Turn. (15 sts)
Row 2: 1 ch, 2 dc in 1st st, 1 dc in each st to last st, 2 dc in last st. Turn. (17 sts)
Row 3: 1 ch, 2 dc in 1st st, 1 dc in each st to last st, 2 dc in last st. Turn. (19 sts)
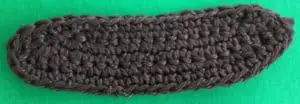
Row 4: 3 ch, 2 tr in 1st st, 1 htr in each of next 2 sts, 1 dc in each st to last 3 sts, 1 htr in each of next 2 sts, 2 tr in last st. Don’t fasten off. (21 sts)
Neatening Row
1 ch, work 1 dc in each st around. Join with a sl st in top of 1st st. Fasten off.
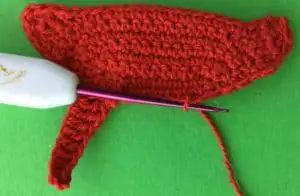
Stand
Join cotton 5 sts before centre st on the bottom of the bottom barbecue section.

11 ch.
Miss 2 sts and work 1 htr in each of next 2 sts, 1 tr in each of following 4 sts, 1 dtr in each remaining st. Sl st in bottom barbecue section. Fasten off.
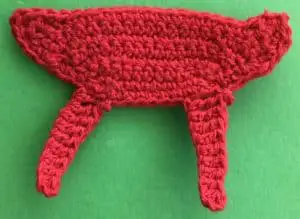
Other Side
Join cotton 2 sts on from centre st on the bottom of the bottom barbecue section.
11 ch.
Miss 2 sts and work 1 htr in each of next 2 sts, 1 tr in each of following 4 sts, 1 dtr in each remaining st. Sl st in bottom barbecue section. Fasten off.
Stand Support
14 ch (or amount to fit between the ends of the stand).
Miss 1st ch and work 1 dc in each st to end. Fasten off.

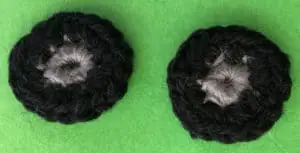
Inner Wheels (Make 2)
Make a magic loop.
1 ch, work 8 dc into circle. Pull circle tight and join with a sl st in top of 1st st. Fasten off.

Outer Wheels
Join black cotton to any stitch on inner wheel.
1 ch, work 1 dc in same st as ch, 2 dc in each st around. Join with a sl st in top of 1st st. Fasten off.
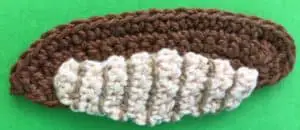
Grill
4 ch.
Row 1: Miss 1st ch and work 1 dc in each st to end. Turn.
Rows 2-3: 1 ch, work 1 dc in each st to end. Turn.
Row 4: 1 ch, 2 dc in 1st st, 1 dc in each st to end. Turn.
Row 5: 1 ch, work 1 dc in each st to last st, 2 dc in last st. Turn.
Row 6: 1 ch, 2 dc in 1st st, 1 dc in each st to end. Turn.
Rows 7-8: 1 ch, work 1 dc in each st to end. Turn.
Row 9: 1 ch, 1 dc in each st to last 2 sts, a joined dc over last 2 sts. Turn.
Row 10: 1 ch, work 1 dc in each st to end. Turn.
Row 11: 1 ch, 1 dc in each st to last 2 sts, a joined dc over last 2 sts. Turn.
Rows 12-13: 1 ch, work 1 dc in each st to end. Turn.
Row 14: 1 ch, work 1 dc in each st to end. Fasten off.

Hamburger
5 ch.
Work 2 dc in 2nd ch from hook, 1 dc in each st to last st, 3 dc in last st, work 1 dc in back of each ch. Sl st in top of 1st st. Fasten off.
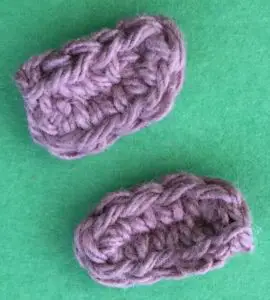
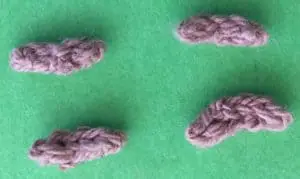
Sausages
5 ch.
Miss 1st ch and work 1 sl st in each st to end. Fasten off.
To Make Up
Weave in ends. Embroider grill marks on the grill.

Stitch the handle to the lid.

Sew the stand support to the bottom of the stand.
Attach the wheels to the bottom of the stand.

Stitch the grill to the top section of the barbecue.
Attach the bottom barbecue section to the top barbecue section (I leave the front middle part unstitched).

Stitch the lid to the barbecue.
Sew the hamburgers or sausages to the grill.
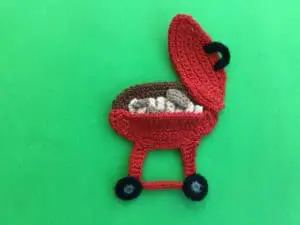
And there’s the finished crochet barbecue, I’ve also made it in different sizes and colours.
I hope that you’ve enjoyed the pattern, if you have I’ve also got other patterns in the beach series that you might like, including these flip flops and beach umbrella.